
How I Built My Own Hummingbird Nectar Heater
By Patricia Duarte-Pocock
We made our final move to Whidbey Island in the winter of 2019. Coming from Southern California, the concept of a heater for hummingbird nectar had never occurred to me. On the rare occasions of a day or two of frost, I merely brought the feeders in for the night.
But here that first winter of cold and snow convinced me that if I intended to keep my feeders up all year, I needed to keep the nectar from freezing. It was clear that the Anna’s hummingbirds were determined to continue visiting my feeders for as long as I kept them filled and flowing. Contrary to myth, Anna’s are not prevented from migrating because we leave food available; rather they will seek out food that is available because they are year-round residents of this area.
After watching the nectar in my store-bought feeder freeze midday, I decided to build my own heater. In my supply of containers for re-purposing, I had been saving the 1.9 lb, metallic lined cans of BIG TRAIN Vanilla Chai Latte mix. When I saw that the diameter of the container was a perfect fit for my nectar feeders I was inspired. I’ve included some instructions for anyone similarly inspired.
Supplies
Supplies you will need:
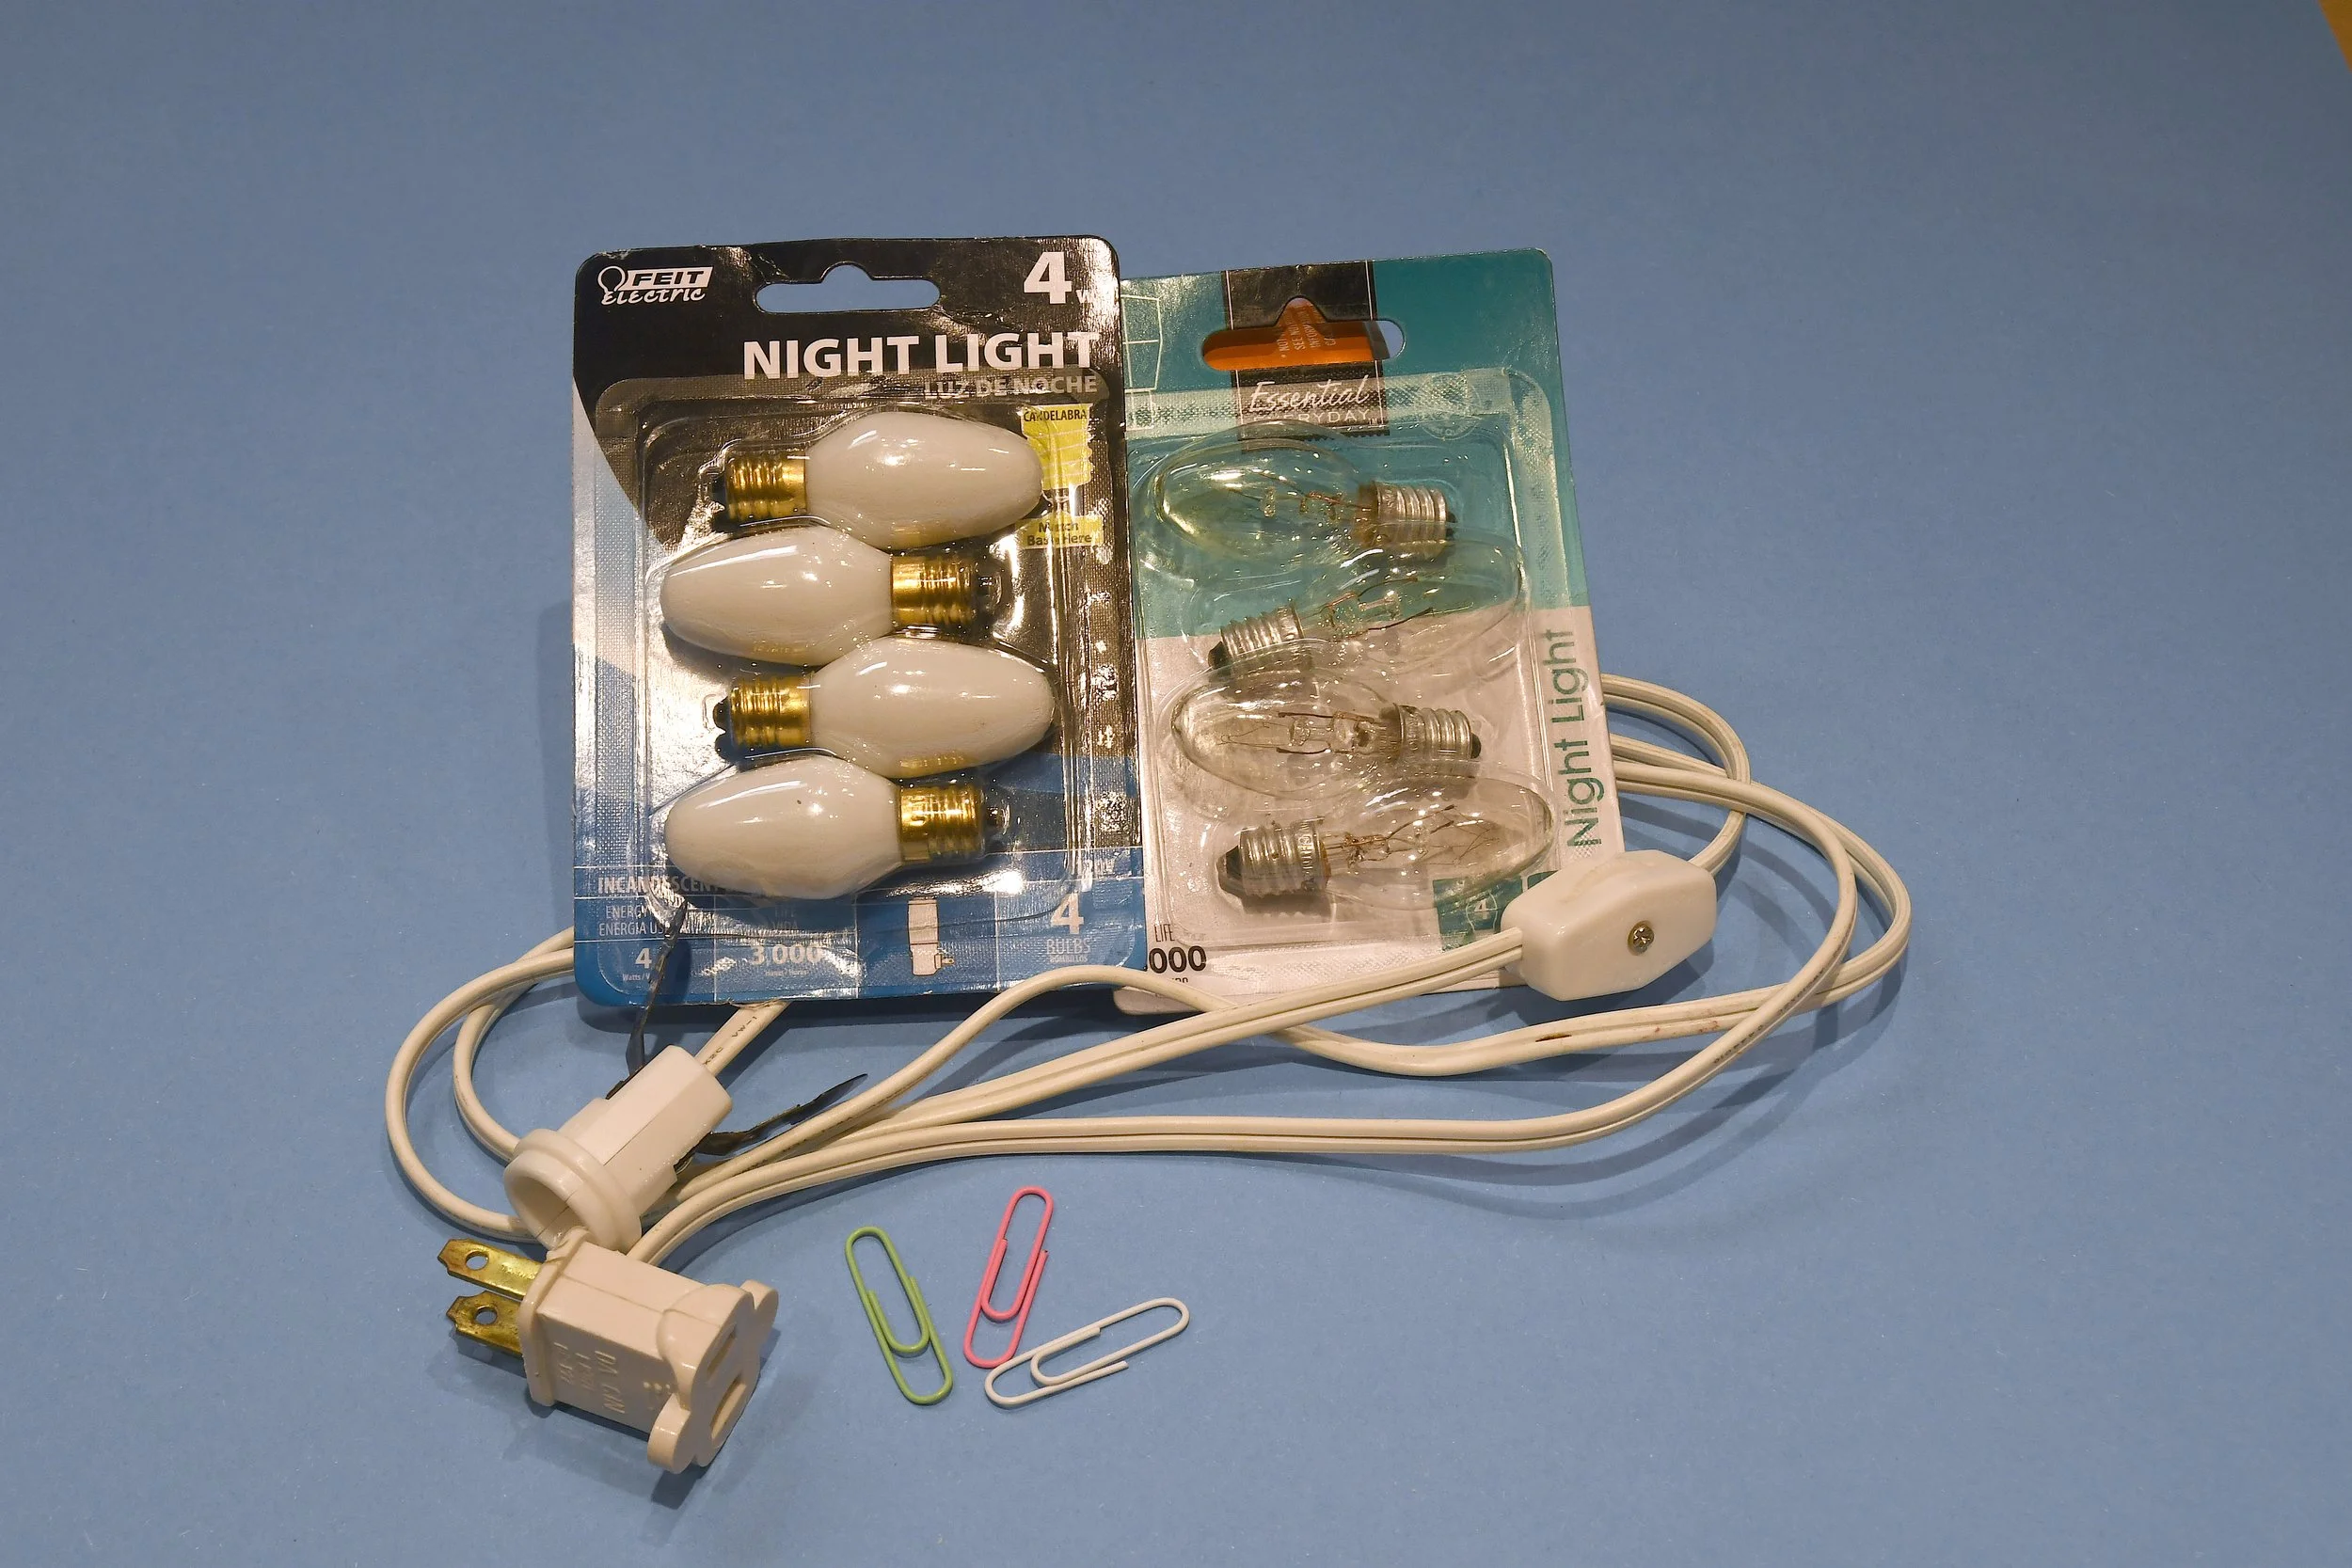
1 chai latte can (internal dimension of 4.5” by 6” tall)
1 single cord light (Dpt. 56 Dickens Village),
4 and 7 watt nightlight bulbs (must be incandescent to generate heat)
paper clips
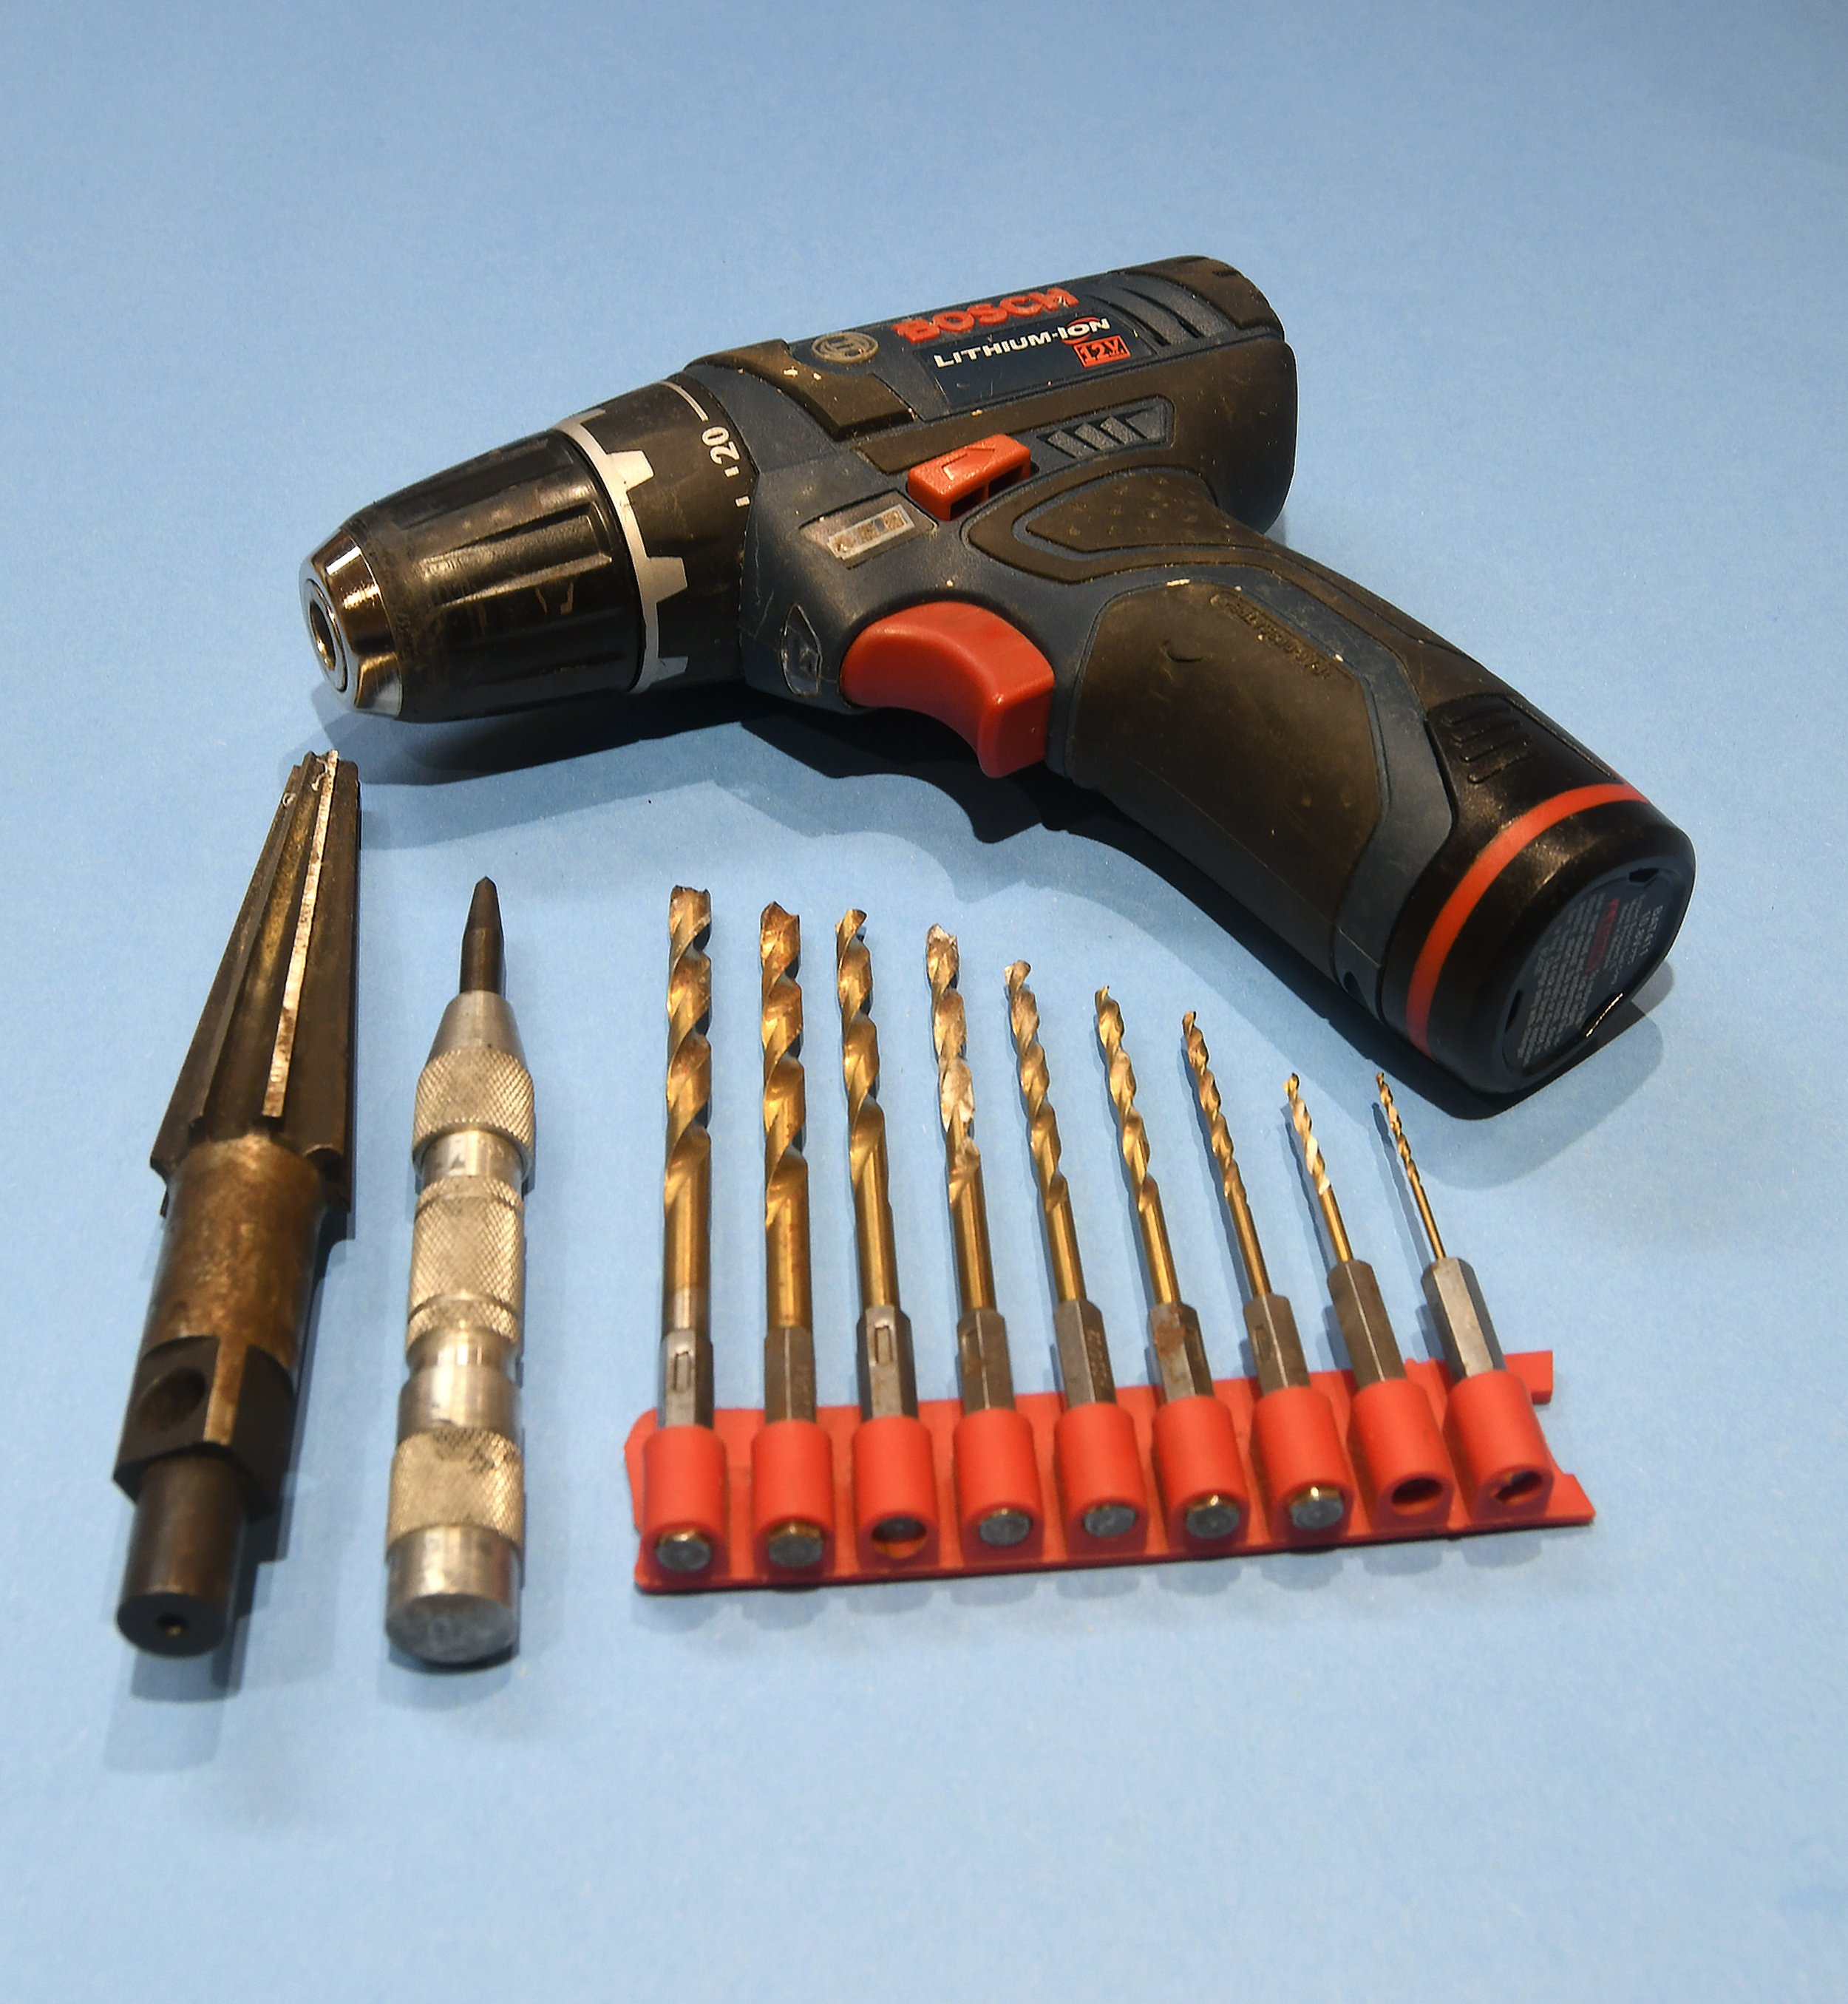
Equipment
electric drill and assorted bits
center punch
reamer
large needle or awl
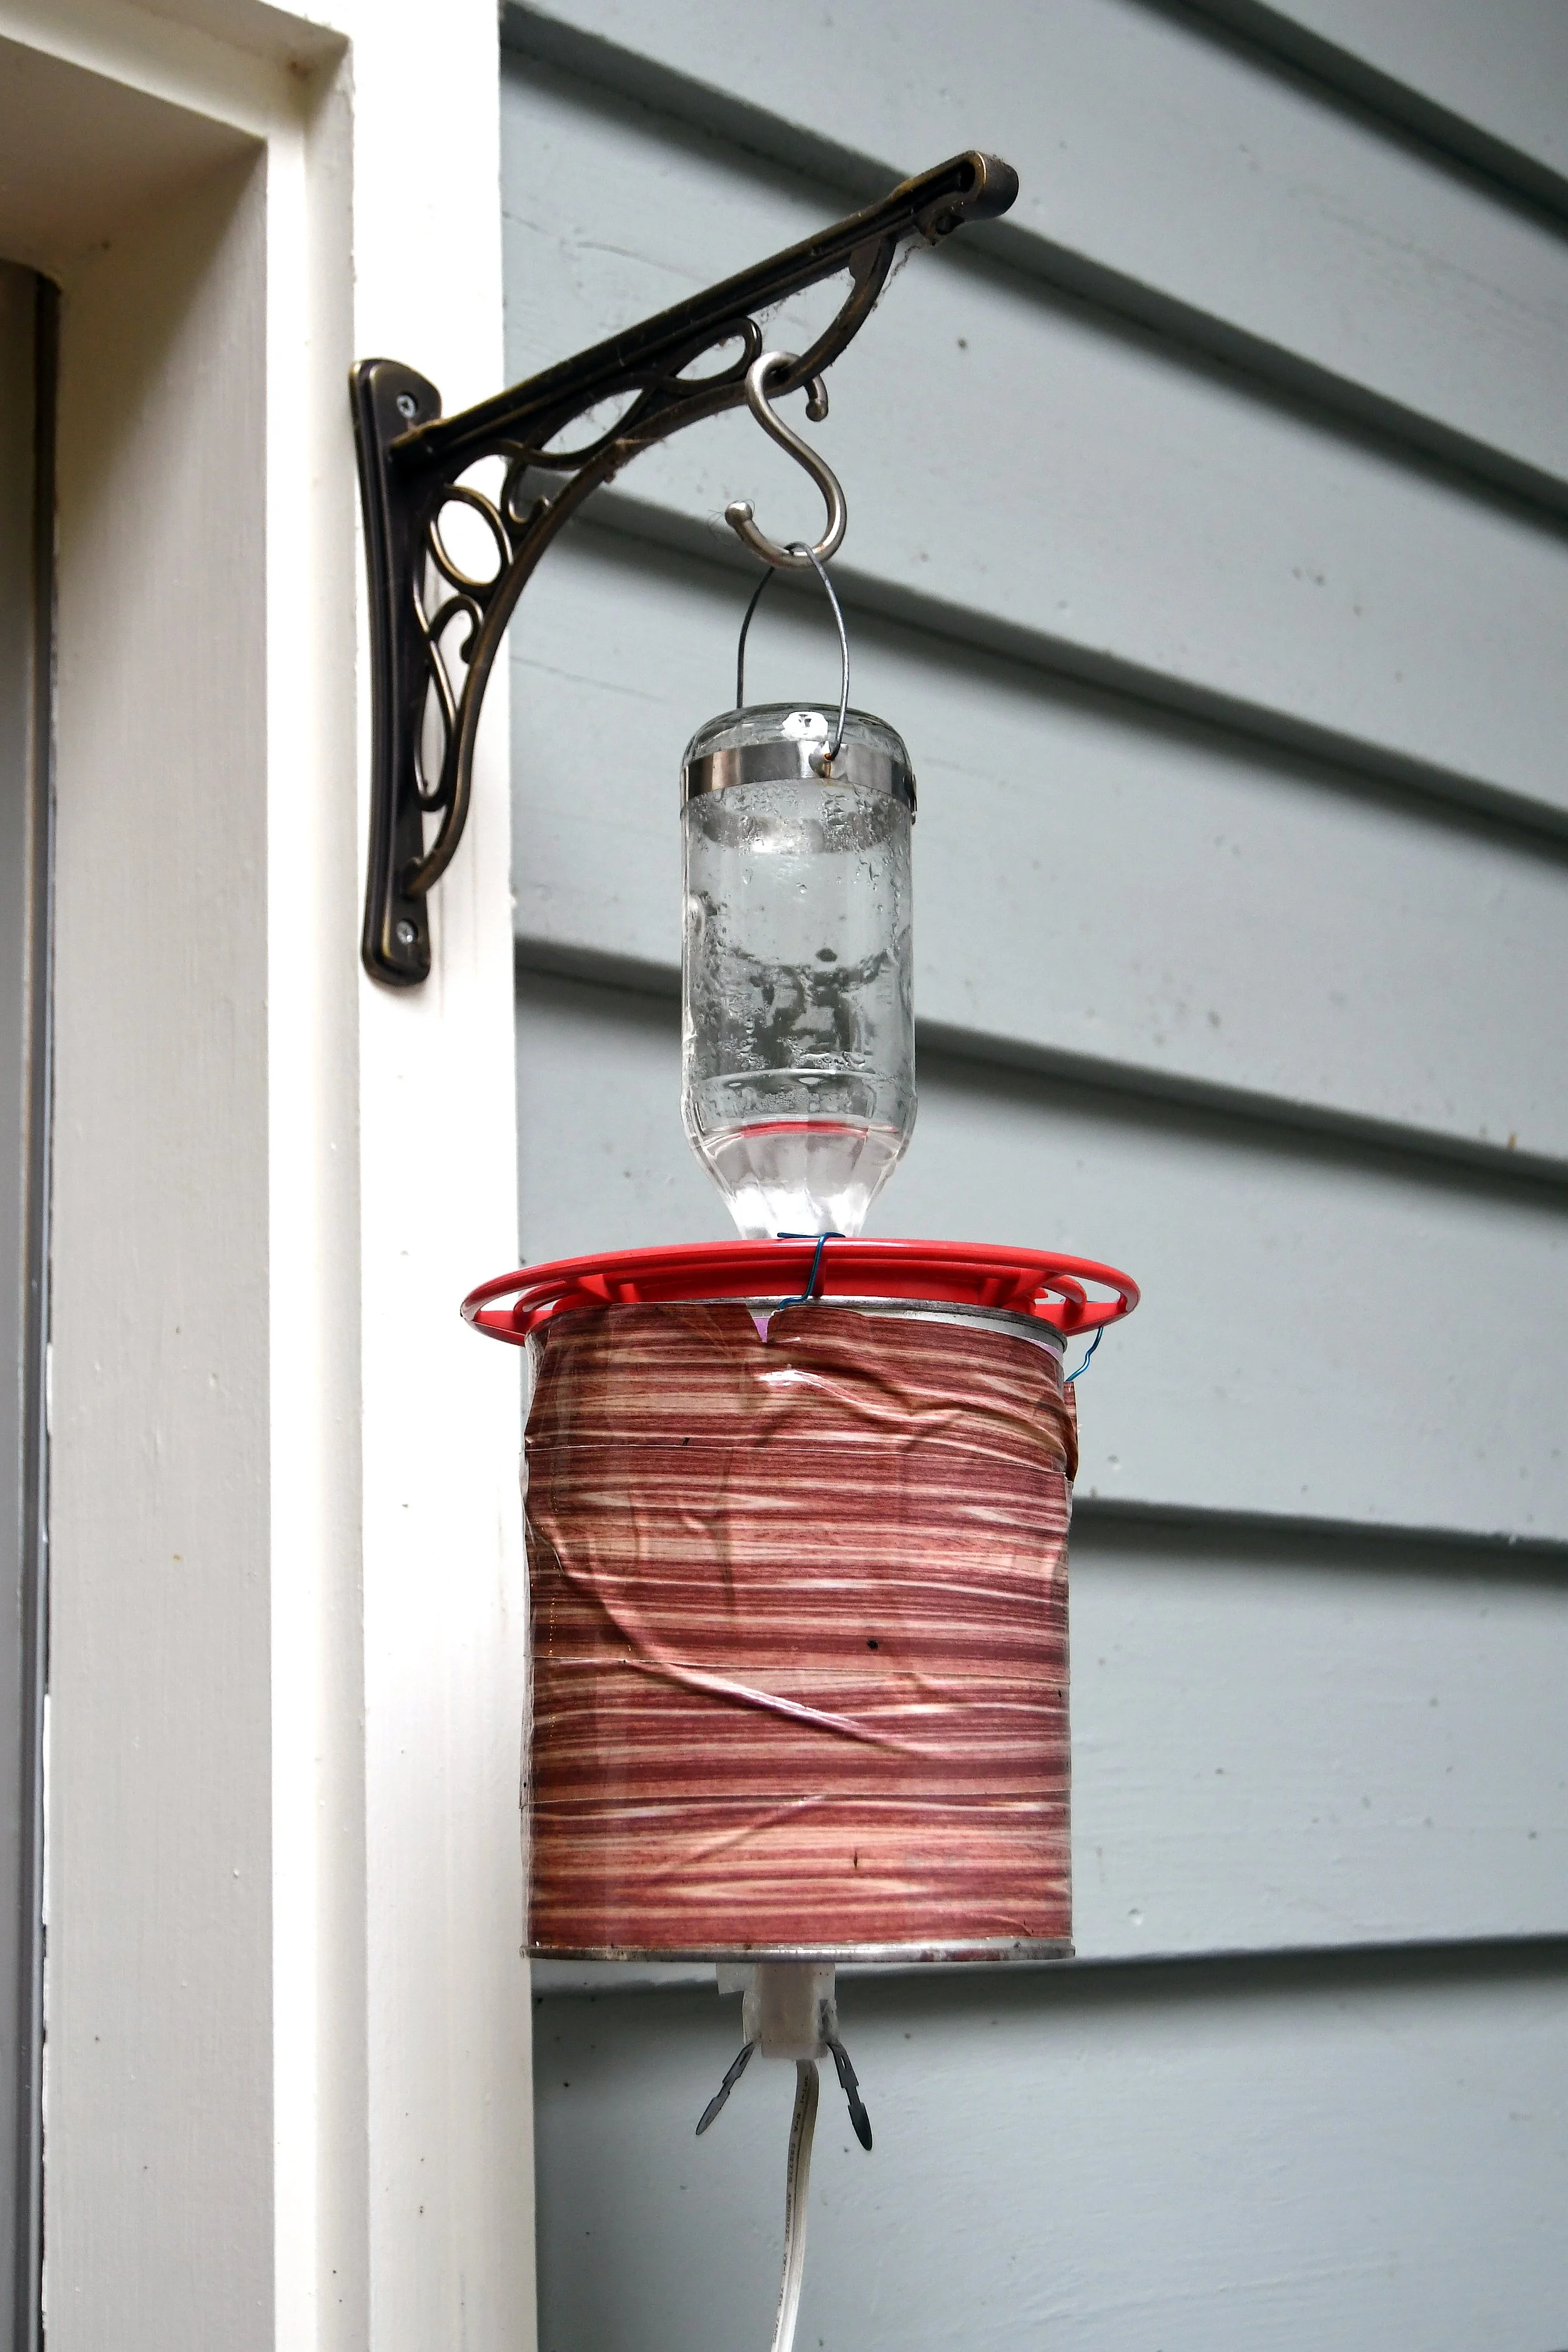
The finished product!
The cardboard chai can is wrapped in a colorful material.
Instructions
Place the container opening down, locate the center of the can and place a mark.
Use a center punch or strike with a nail to create a dimple in the metal bottom. This will hold the drill bit in place to create your first opening with a small bit.
Continue enlarging the hole with gradually larger bits until you’ve used the largest bit available.
Use a reamer to enlarge the hole to the size of the outer diameter of the night light bulb collar. This is about ¾” or 2 cm. This should be a snug fit so it stays in place with use. The bulb collar can be taped or glued in place with silicone sealant.
The heater is attached with paper clips so the feeder can be easily cleaned,
Puncture the upper cardboard rim of the can with a large needle or awl in three equally spaced locations.
Insert one end of the paperclip and create a sharp upward bend in the inner end of the clip so both surfaces of the clip (inner and outer) are lying close to the can.
Repeat with the other 2 clips.
Place the bottom of the feeder onto the can opening.
Bend the free ends of the paperclips over the feeder trough to hold it in place. I roll the clips back in an S shape to give it a better hold.
Note: since you will likely keep the heater plugged into its electricity source, fill the nectar feeder and invert before placing it into the heater. I leave mine up all winter and turn the switched cord off on warmer days and back on at night. I use the four watt bulbs for most days but switch to the seven watt bulbs and wrap a layer of bubble wrap around the glass bottle when the temperature gets below freezing for several days.
Questions?
Good luck! And contact me if you have questions.